Wednesday, 29 February 2012

Barry M Instant Nail Effects : Gold Foil 320

Good news, I found the battery charger for my camera at last! You no longer have to put up with the dreadful camera phone pictures I've been inflicting on you recently :D

In way of celebration, I decided to paint my nails with Barry M Instant Nail Effects, in Gold Foil 320.


This blingtastic gold foil paint is supposed to look something like a Minx nail wrap, and, well, it doesn't really. It's nowhere near as shiny as a wrap and instead of polished, mirror-like gold, it has an almost-but-not-quite matte, 'brushed metal' kind of finish that I guess you could describe as 'satin metallic'. If nail wraps are the shiny effect of cooking foil, then this polish is the less shiny reverse side. However, it's still utterly gorgeous!


This polish is VERY pigmented; I kid you not when I say it was opaque in one coat; though I actually used two because it made it look smoother and more wrap-like than it appeared at just one coat. As it's such a smooth foil effect, it does unfortunately show up every imperfection in your nails, though it isn't as obvious in real life as it is in these pictures (close up photography and macro can be so brutal!). Regardless, unless your nails are in really good shape, you're going to need a good base coat, preferably a ridge filling one. You're also going to need to apply this stuff with confident, even brush strokes, because like most metallic foils, it's prone to brush marks if you stop to faff around or go back over already wet areas - though again this is less obvious in real life and also improved by adding a second coat. The formula helps make this easier than it could have been, since it's not too runny and not too thick and applies nicely; the brush isn't a bad shape either. Drying time is pretty decent; one coat dries very quickly, two takes a little longer, but nothing arduous.


Close up, with flash. As you can see, when the light hits it, this polish gleams! It might not be full on polished metal Minx effect, but it's very definitely gold, and actually I love the semi-matte effect; it means that most of the time this polish is subtle, not too in your face, and just shines and catches the eye when you move your fingers. I wore this at work and wasn't even the least self conscious about having garish nails. Two days later and there's still no tip wear or chipping anywhere. I'm really impressed!

Oh, and for those of you that are into stamping nail art; I'm told that this polish is very good for stamping!

Saturday, 25 February 2012

The Versatile Blogger Award!

This summary is not available. Please click here to view the post.

Thursday, 23 February 2012

Quinoderm (and TMI Thursday Update 3)

Well my lovelies, it's TMI Thursday again and therefore time for another problem skin update. This week I have been using Quinoderm cream morning and night.


Quinoderm cream contains 10% Benzoyl Peroxide and 0.5% Potassium Hydroxyquinoline Sulphate. The Benzoyl Peroxide works by breaking down some of the links between the skin cells in the top layer of skin and allowing them to slough away: it works a bit like a skin peel, useful in acne because a lot of the problems are caused by pores becoming blocked by dead skin cells. The blocked pores then become infected which is what gives you nasty spots, and that's where the Hydroxyquinoline comes into play: it kills bacteria and fungi that could otherwise have infected your pores.

The cream itself is described as a 'vanishing' cream, this just means that you don't have to rub it in very much and it will still disappear quite quickly. It's an off white colour and it has a sort of musky, medical smell. You apply it to the problem areas of your face after cleansing and then you leave it alone to soak in.


I'm not going to lie to you, girls. (And boys? Do I have any male readers? I hope so!) This stuff is STRONG. 10% Benzoyl Peroxide is about as strong an acne treatment as you can get without a prescription and you're going to need to do a patch test before covering your face in this stuff for the first time. You're also going to discover one especially noticeable side effect when using Quinoderm : it STINGS. Not unbearably so, but it's definitely beyond just 'tingling a bit'. The stinging lasts maybe 5 or ten minutes after application and then it goes away. You will also need to be careful not to get it anywhere near your eyes; this means if you apply make up, don't accidentally transfer the cream from another part of your face onto your eye area because YOU WILL REGRET IT. Trust me on this one. You won't die, or go blind, but you'll have some pretty uncomfortable burning sensations under your eyes for about half an hour to an hour afterwards and let's just say it won't be especially fun >.<  In order to avoid this happening, I try to let the Quinoderm dry right into my skin before applying moisturiser etc. I also do my eye make up first before the rest of my face so that I don't accidentally pick any of the cream up and move it to my eye area on my make up brushes.

Something else I've noticed is that this cream causes a bit of dry skin and peeling. This is SUPPOSED to happen because it's part of the way it works. It's annoying but not so bad it can't be dealt with by moisturising well and the careful use of a facial scrub here and there. I'm just gritting my teeth and telling myself it's a sign the stuff is working! (EDIT: I eventually found that the dry skin wore off anyway: it seems to be an initial reaction that doesn't last forever)

This stinging and the peeling is definitely worth putting up with, though. I've been using Quinoderm for about three weeks now, once a day to start with and over the last week I've increased it to twice a day - and there's a definite change going on here. It's too soon for my spots to magically vanish (I'm told it can take 6-8 weeks of twice a day application for that to happen) but I've noticed that my blackheads are becoming much easier to remove, and when I have a spot, it's smaller and doesn't seem to last as long. I haven't had to use my extraction kit as often, which can only be a good sign! (EDIT: after 6 weeks, magic happened. Trust me, it's worth persevering with this stuff).

I'm not going to put up any progress photos this week though. Even though things are definitely better and my skin has improved, it doesn't seem to want to show up in photographs just yet. The change is more to do with how my skin feels and how long the spots hang around when they do appear. Only bad things happen quickly, eh? Watch this space and hopefully I will have update piccies for you in a week's time!

Monday, 20 February 2012

Rimmel 60 Seconds Vinyl Shine : Denim Dreams

OK so let me apologise up front for the pictures in this post; they're rushed to death, taken on a camera phone and blurry. It's also about the least tidy manicure I've done in a long time... it looks like I don't even know what cleanup means! GAH!

There's a very good reason for this: I'm trying to beat the clock! A very good friend of mine sent me this polish as part of a polish swap, and it's one of her favourites. Her mum is very poorly in hospital and she's flying out to see her this afternoon. I wanted to make her smile, so I'm trying to rush this mani and get it online in time for her to see it before she leaves. Soooo... no time for perfection! LOL


Denim Dreams is one of Rimmel's 60 second fast dry polishes, but unlike the rest of them, this one is supposed to have a vinyl effect once it dries. In reality this makes it a little tricky to apply; it's prone to brush strokes, and doesn't have the fancy Pro brush that Lycra Pro and some other Rimmels have. But applied carefully (and by carefully I mean with a decent, but not excessive amount of polish on the brush, applied quickly, with as few strokes as possible) it does give a rather cool wet look plastic finish that doesn't come across too well in these pictures, but in real life does look rather like you've got a layer of vinyl coating your nails. As with all of the 60 second Rimmel polishes I've tried so far, the 60 second claim is NOT to be believed; I used two coats of Denim Dreams over one coat of Nail Envy and after an hour, I touched something (lightly) and immediately got a dent! I'd definitely say that quick drying top coat is a must for this polish if you don't want to be sat there all night waiting for it to dry.


The slightly tricky application and slow drying time are more than made up for the unusual vinyl look and the really pretty denim colour of the blue. Most of the pictures I took showed this polish as a much brighter shade than it really is, but this one solitary shot here has the colour pretty much perfect. (Excuse the lobster red fingers; apparently my camera can't cope with photographing blue AND flesh tones correctly at the same time!). Those two bright spots on my index and middle fingers are light reflections in the wet look plastic finish :-). I've worn this polish a few times now and it goes nicely with my favourite blue denim dress, as well as jeans.

Thanks Hilde, hope your trip goes well and your mum is OK!!


Sunday, 19 February 2012

Blog Love Therapy Blog Hop!


BlogLoveTherapyBlogHop
I'm taking part in the Blog Love Therapy blog hop! Why not join in the fun?


Blog hops are a great and fun way to get discovered, meet and gain new followers, and to be inspired by other bloggers. This hop will last an entire week; from Saturday, February 18, 2012 to Friday, February 24, 2012. To join this blog hop, click the button :)

Thursday, 16 February 2012

Dermatologist's Extraction Kit

I thought I'd start my series of skincare reviews with a tool rather than a product: the dermatology extraction kit, because this is what's made the biggest difference to my skin so far.
It consists of a handle with several interchangeable head pieces in a storage case. I picked this up on Ebay for about £10; there are cheaper ones out there with fewer ‘bits’ but since my skin is so stubborn when it comes to extraction, I wanted a good selection of attachments to experiment with.

1. It’s not a good idea to buy one of those and just stab at your face willy nilly; you could easily damage your skin if you go at it unprepared. Talking to a dermatologist is a good idea, failing that, there are quite a few videos on YouTube which demonstrate the correct way to use these kinds of tools safely and I'd recommend you check them out before trying this at home.

2. It’s also VITAL that you sterilise these tools in between uses. If you have acne, your skin is already infected and sore... the last thing you want to do is add even more germs!! I do it by soaking them in a mug of boiling water for ten minutes. You could also use alcohol, or those tablets that disinfect babies’ bottles.
Now on to the review!

These somewhat barbaric looking tools are basically just very sharp points which you can use to pierce a lesion (usually open comodogenes, also known as whiteheads, or zits) before you try to extract it. By doing this, much less force is needed, which means you do less damage to the surrounding skin when you squeeze, there's less swelling, it hurts less, and the lesion heals much quicker afterwards. Because they're so sharp, they don't hurt; you just find the 'head' of the spot and prick gently - you can feel when the skin breaks and you end up with a tiny neat hole instead of a horrible big split in the skin where you forced the spot out by brute force and ignorance!!  You can also use these sharp tools on smaller cystic acne. These are the zits that form so deep under the skin that they don’t form a proper ‘head’ like a regular zit does. Some of them can last for weeks, months even - and they really hurt! However, you need to be careful with this type of acne. Shine a strong light on the lesion. If it seems to be coming to a point somewhere, like maybe it’s trying to form a head, then make the hole at that point, but GENTLY. If it doesn’t work the first time, it’s not ready and needs to be left alone. You can maybe try again a day or two later. Really big and deep cysts that don’t even try to form a head, shouldn’t be pierced at all and should be treated by a doctor, probably with antibiotics.


The strange looking things on the left are for extracting closed comodogenes; or 'blackheads'. You’re supposed to put the hole over the blackhead (suitably prepared for extraction by steaming or a long hot shower) and press, so that the round part pushes out the blackhead. Many people swear by this, however my blackheads tend to be deep and hard to remove, so I have had little success with these tools - since pressing hard enough to extract the blackhead would result in the metal part literally cutting into my skin. On the right of the picture is a loop shaped tool intended for whiteheads. You use it for removing the, uh, contents of the zit once you’ve pierced it (nice). It works quite well, however I honestly found it more effective to use my fingers and a tissue. If you have very long nails, though, it’s very hard to do this, which is where this tool would be extra handy! 


Finally there are these weird looking things here. I have no idea what they're for, so if anyone knows, please feel free to educate me. They look like tools an ancient egyptian might use for scooping out mummies’ brains through their nose :-p

Overall, this has proven a very useful set of tools for me, even though I only really use the sharp tools and occasionally the loop, it’s been worth the money I spent.  Along with the treatment products I’ve been using, it's stopped my cystic acne in its’ tracks. I used to get the really big, deep cysts, but timely use of this kit has allowed me to get rid of those while they’re still small. It’s also let me get rid of any zits as and when they’ve appeared; I could have done this without any tools but it’s quicker and easier this way and seems to take less time to heal afterwards.


Please note although I am a Biologist, and I do know a thing or two about skin and germs, I am not certified as a dermatologist. This is not official dermatology advice, it’s just what I’ve learned works for me.

TMI Thursday Part 2

So the more observant among you may have noticed that I promised to do a weekly feature on skincare for acne, did one post, and then nothing happened for a whole month. Sorry about that: what happened was, I started off all gung ho, then had a bit of a setback that's taken a month to recover from. That doesn't mean there hasn't been any progress at all; quite the opposite, in fact. It's just been a bit slower and more complicated than I originally planned >.<

Anyway, on to the update.

Remember these?


Here you see Quinoderm cream (blue tube in the front right) and a selection of salicylic acid containing products including a facial scrub, two types of face mask, moisturiser, cleansing liquid and an on-the-spot treatment gel.

Original Plan of Action: 

Morning: Facial scrub, Quinoderm, Moisturiser
Evening: Cleanser, Quinoderm, Moisturiser
On the spot gel: as and when needed
Facial Mask: two or three times a week

I also had this scary looking piece of kit; it's basically a set of tools for extracting blackheads and whiteheads. I intended to use this whenever I got one of those real nasty breakouts; the ones that just have to be dealt with physically.


What Actually Happened:

Week one: I followed the plan above. Then I discovered that when your skin is as sore and irritated as mine was (before shots HERE), using this many products all at once is a Very Bad Idea. After about 5 days of this, I looked like I'd been scrubbing my skin with a mixture of sand and battery acid.  Sooo... I spent the next week leaving my skin alone completely and waiting for it to calm down. 

In week three, I regrouped and came up with a new plan. It seemed like the biggest offenders in irritating my still-healing acne were the facial scrub and the two masks, so I put them aside, along with the on the spot treatment gel. I'll still use them, but not until my skin has had chance to heal up some! 


New plan of action (while skin calms down):
Morning: Cleanser, Moisturiser
Evening: Cleanser, Quinoderm, Moisturiser
As and when needed: use extraction kit.

I've been following this plan for a week and a half now. Even though it hasn't been very long yet, I'm pleased to announce there has been definite progress: update images HERE.

The acne on my jawline is looking a lot better already. It's pretty much just blackheads there now. My forehead, always the worst affected, still looks quite bad, maybe even worse! But it doesn't feel so bad. the type of lesion has definitely changed. I haven't had any of the really big, painful, deep cystic spots I was really prone to before. There's been a couple of smaller cysts, but the Quinoderm seems to be stopping them from getting out of control like they used to, and  I've been able to deal with them with the extraction kit quite easily. Other than that, there's just been a few whiteheads (also easy to deal with). As for the blackheads, well they haven't vanished but I wasn't expecting them to. What HAS happened, though, is they've become slightly more prominent, like they're starting to come to the surface somehow? And they've also become easier to remove. It's like the Quinoderm and Clean and Clear have made them looser and I can see that when I do get back to using a scrub on them, they'll start to come away  :)


All in all, considering the setback I had and the fact it's really only been about a week and a half since I started doing this properly, I'm quite encouraged. Next week, I'll be increasing the Quinoderm to twice a day, which is what the instructions suggest you're supposed to do. I just kept it down to once a day because my skin was so angry with me and Quinoderm is very strong.

I'm going to put up reviews for the products I've been using so far as separate posts - watch this space! 


Tuesday, 14 February 2012

Rimmel Lycra Pro: 385 Hot List


Today's polish is the very lovely Hot List, from Rimmel's Lycra Pro range. I'm sure you're all completely sick of hearing me bang on ad nauseum about Lycra Pro and how great they all are; awesome brush shape, great formula, long lasting and almost no chips, great pigmentation, blah blah etc etc. So I'll spare you the waffle and just say that this polish is no exception to the Lycra Pro rule; it goes on like a dream, dries quickly, looks great and lasts AGES.


This one is especially exciting, however, because it's an almost exact dupe for the hugely popular (and hugely expensive) Chanel Paradoxal. I don't have Paradoxal to make the comparison myself, but there's any number of swatches out there and they're very close; the shimmer is slightly different but considering Paradoxal is currently retailing for £20-£30 on ebay and Hot List costs less than £5, plus Paradoxal is notoriously chip-prone (Hot List has so far been on my nails - two coats over one of Nail Envy plus one of top coat - for 5 whole days without any chips OR tip wear), it's more than close enough for me.

Hot List is a bit of a chameleon polish; technically it's a greyed-out dusky mauve but in some lights it looks much closer to dark beige or taupe, like this:


But there's more! There's a gorgeous purple shimmer running through Hot List which I'd call a 'hidden' shimmer; it only comes out when the light hits it, like this:


Isn't it gorgeous? It's such a sophisticated, classy, grown-up colour, infinitely work safe, but not in the least bit boring.

Check out this shot of the bottle's base that really shows the purple shimmer. It's nowhere near this pronounced on the nail but it's so pretty!


You might have noticed that I shortened my nails again and am trying out a new, more squared shape; I'm not convinced it suits me (plus it feels so weird compared to my normal oval/pointy comfort zone!). What do you think looks best on me?

Wednesday, 8 February 2012

Rimmel I Love Lasting Finish : Hot Shot

It's been weeks since I had anything other than plain or nude nails; longer than I've lasted in a long time, but I finally cracked yesterday and broke out the first bright colour I saw on opening my stash drawer: Rimmel Hot Shot.


(Without flash. Please excuse the scratch on my finger; a wardrobe bit me)

Hot Shot is a hot pink creme from Rimmel's Lasting Finish range; in the bottle it's pretty darn bright already but on the nail it dries brighter, almost neon pink but not quite. The above picture is without flash: the colour of the bottle is accurate but the nails are not as bright as they are in real life.


(with flash)

This flash shot more accurately captures the brightness; it's not quite this purple toned in real life but it's definitely this intense. If you imagine something this bright but with a colour closer to the first picture then you're there!


(without flash)

Formula wise this polish wasn't quite as good as some of the other Rimmel Lasting Finish shades I've tried; it's a little on the thick side and difficult to apply nice thin coats, and it tends to apply a little streaky: watch out for bald spots. It's not unworkable; just needs a little more care over application, and you'll need two coats for sure. Drying time wasn't too bad, although after the second coat I did use Orly Sec'n'Dry to hurry things along.


(with flash)

Wear was okay... I had tipwear by the end of day two but not unbearably so, and there weren't any chips. 
Overall, I would wear this polish again; I didn't love the formula, though it's not unworkable, but the colour is really nice (and this is coming from someone who doesn't wear that many pinks) and I enjoyed wearing something so bright and summery even though everything outside is icy and cold!


Tuesday, 7 February 2012

Naughty Blogger

A few times recently I've received email notification that somebody has left me a comment, but when I've come to answer them (I try and answer all my comments), there's been nothing there! Some other bloggers have reported the same problem recently so I can only assume Blogger is playing up and has deleted them.
If you've left me a comment recently, and it's vanished, please rest assured it wasn't me!

Monday, 6 February 2012

NYC Expert Last : 165 Carrie'd Away

Things have been a little quiet here at Glitter Mountain : I had some offline drama to deal with and it took me away from the computer (and from polishing my nails) for a while. Sorry about that; I'm back now!

Today I'd like to share a new-to-me brand: New York Color, or NYC. This brand has been around for ages, but it's only recently that I managed to find a shop that stocked it - and how excited was I to discover their polishes are all as cheap as chips, yet there were some really nice colours amongst them! My nails were a bit stained at the time, which made it hard to go 'bare', yet I knew I wouldn't have time to look after my nails much for a while, especially anything that takes as long as buffing out stains. What to do?

Enter NYC Expert Last, in Carrie'd Away. 


This pretty shell pink/nude colour was supposed to cost the princely sum of £2.48, hardly bank breaking in the first place, but I got it on special offer so it worked out about £2. I wasn't expecting too much from anything that cheap, but when I got home and tried it out, I was amazed! 

Firstly, the bottle and brush. I wasn't too keen on the shape - the top is bigger than the bottom, which made it look a bit odd and wasn't too comfortable to hold, but it wasn't unbearable. The brush was reasonable: nothing fancy about it, but nothing unpleasant either. It held the right amount of polish, didn't splay too much, wasn't too stiff etc. It did the job it was meant to do.

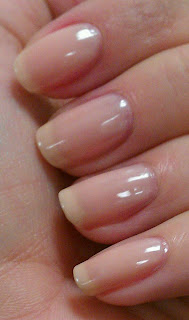
Secondly, the formula. This polish is very sheer: don't come calling at Carrie'd Away's door if you're not a fan of seeing your nail line, but I don't count that as a bad point since this is the kind of colour where you're supposed to have VNL. It's like a french mani, but more subtle, without the full on white tips. (It'd also make a great polish for an actual french manicure; just add white tips and you're away!). Pictured here are three coats over nail envy:


I like the colour a lot; it's close enough to my skin tone to look nice and clean, not too pink, not too peachy, and I can see me using it a lot as a palate cleanser as well as for when I want that bare nail look without actually having bare nails. 


Since it's sheer, it also tends to be a little runny; watch how much you're loading on the brush or you'll flood your cuticles, but as long as you use a moderate amount and aim for thin coats, it's not a big deal. Drying time isn't bad, and as you can see it dries nice and glossy (this picture was before topcoat). 

The real surprise for me with this polish was how long it lasted. I kid you not; it stayed completely free from any signs of chipping OR tip wear for a whole week!! SEVEN DAYS! In the end I had to take it off because it started lifting around the cuticles (out of sheer old age!), but still not a single chip or flaw on the tips. I'd used a coat of Orly Sec'n'Dry as topcoat, but I use that for almost all my manicures and whilst I'll admit it does make things last longer, I work in a job that requires a LOT of typing and even with the Sec'n'Dry, the only time I've achieved more than a couple of days without at least a bit of tipwear was with Essie Bordeaux. For a polish that costs so little, I find this utterly amazing; I'm excited now to try the other colours I picked up along with this one!